Navigation
Zoom Options:
Hover over any tool to find it's name. There are several ways to zoom and pan to navigate this mapping tool:
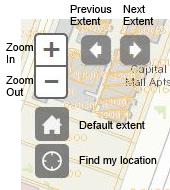
Navigation Tool Bar
a) Hold the shift-key and drag the mouse over an area. (Red box should show).
b) Use the mouse wheel forward and back.
c) Use the (+) or (-) on the Navigation tool.
d) Use the Home icon (Default extent) to go to the full extent of Oregon.
e) Use the Find My Location icon to zoom to your current location. This is more applicable to mobile devices.
f) Use the Previous or Next Extent arrows.
g) Use the search tool (see below).
Pan Options:
Hold down the mouse key and drag the mouse across the screen. For mobile devices, simply touch the screen and drag.
Search By Location:
Zoom to Location
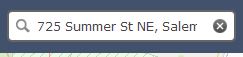
Enter a name or address in the Zoom to Location box. This search tool uses a worldwide database, so you will need to include the state. (For example: Burns, OR; Mount Hood, OR; Benton County, OR). Full addresses can be used (For example: 725 Summer St NE, Salem, OR)
Latitude and longitude may also be entered in the format: Longitude, Latitude in decimal degrees. (For example, -123.000001, 45.000001) However a point will not be indicated on the map. To mark a point on the map, use the Zoom to Latitude/Longitude tool described below.
Other Search Options
Select from the radio button any one of the following search methods:
- Township, Range, Section (TRS), Section is optional.
- Latitude/Longitude
Find Resources
To select wells:
- Click on the "i" icon
- Click on the map and drag a box.
- Release the mouse and the results will be show in the box below. Features will be enlarged on the map.
- A count of the number of features selected will be listed.
In addition to the results shown at the bottom from this selection, a hyperlink to the public well report website with the coordinates selected will appear. The well report website can be used to view the records .
Identify Other Features
The Identify Features tool queries many datasets to find their attributes for a given point.
If a buffer is needed, it can be added in units of feet or miles. Please note, however,
the search will be slower. There is a limit of a 5 mile (26,400 feet) radius for the buffer
search. The buffer distance is indicated in the marker point on the map.
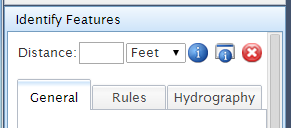
There are two views of the Identify Features. Option 1: Simple identify point on map.
Option 2: Similar, but provides a pop-up report that can be printed. Pop-ups will need to
be enabled for this site for this to work. Option 2 also provides sources and dates of the data used.
Other Layers
Layers can be controlled by the check boxes. Opacity of the layer can be controlled by the slider bar.
Click the arrow to open the list of layers until you see the legend. See "Understanding the Data" for more
information on each layer.
Tool Pop-outs
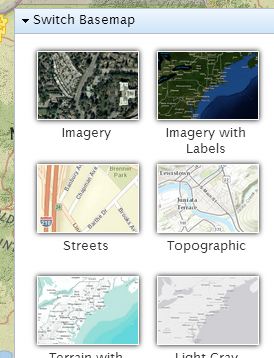
Switch Basemap
The Switch Basemap options allows changing of the basemap. The default is "Topographic". Other options include:
- Imagery
- Imagery with Labels
- Streets
- Topographic
- Terrain with Labels
- Light Gray Canvas - nice for muting the background with some detail remaining
- National Geographic - nice for a colorful basemap
- Oceans
- OpenStreetMap - nice for seeing urban areas and streets
- USA Topo - scanned images of the USGS topographic maps
Most of these basemaps are provided by ESRI web map services. Dates and sources for these basemaps are subject to change at any time and are not within the control of OWRD.
Once a selection has been made, close the menu by clicking the blue bar at the top again.
Measurement
It is important to note that the tools for measuring are toggles. When you turn a tool on, it will stay on until
you click the tool again to turn it off. If you do not turn off the tool, it will continue to measure when
you return to the map to do other tasks, such as panning.
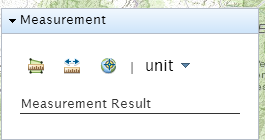
There are three measurement tools. From left to right, Area, Distance, or Location. You have the option to change units of
measurement. To use:
- Click on the Measurement task bar to open the Measurement tool
- Click on the tool icon: Area, Distance or Location (hover over the icon to find the name of the tool)
- Click on the map
- Double click on the map to stop measuring area or distance
- Change units, if desired
- Note the results
- Click on the tool icon again to stop measuring
- Click on the blue Measurement task bar to close the Measurement tool
Helpful Tips
Time Saver
- For easy zooming, hold the shift-key down and drag your mouse. A red box should appear.
IPADS: Notes
- In order to use Option 2 of the Identify Features, pop-ups must be enabled.
To do this, open up the "Settings", "Safari". Turn off the "Block Pop-ups" option. When
you use the tool, it will ask you if you want to allow pop-ups from this website. Select "Allow".